
Introduction to Algorithmic Trading: Building Trading Strategies with Python
Algorithmic trading turns a trading strategy into programmatic rules and lets a computer execute buy and sell decisions automatically. In the crypto market, 24/7 trading, open APIs and highly structured data make it a natural testing ground for algorithms. A large share of trading volume on major exchanges is already executed by automated programs. For ordinary developers, Python, with its rich financial libraries and clean syntax, is the friendliest way to get started.
The Technology Stack of Algorithmic Trading
A complete algorithmic trading system usually contains the following layers:
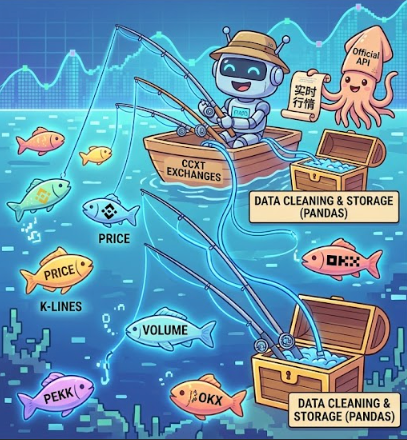
Data Layer: Acquiring Market Data
The first step of any trading strategy is acquiring reliable historical and real-time data. The mainstream options include:
CCXT (CryptoCurrency eXchange Trading Library): a unified interface library that connects to the market data and trading APIs of 100+ exchanges. With CCXT you can reach Binance, OKX and other platforms with the same code.
Official exchange APIs: mainstream exchanges such as Binance and OKX provide complete REST and WebSocket APIs. Focus on the basics: account queries, live market data, automated order placement, and take-profit and stop-loss settings.
Python data libraries: pandas and NumPy for data cleaning, candle aggregation and feature engineering; MySQL or SQLite for persisting historical data.
Strategy Layer: Defining Trading Logic
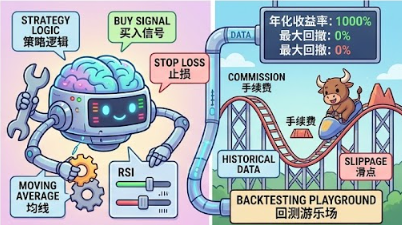
The strategy layer is the core of the system: it turns market data into trading signals. A standard strategy class usually contains:
class BaseStrategy:
def prepare_indicators(self, data):
# compute technical indicators: moving averages, RSI, MACD and so on
pass
def generate_signals(self, data):
# turn indicator signals into buy and sell decisions
pass
Take a simple EMA crossover as an example:
class EMAStrategy(BaseStrategy):
def prepare_indicators(self, data):
df = data["1h"].copy()
df["ema20"] = EMA(df["close"], 20).value
return {**data, "1h": df}
def generate_signals(self, data):
df, signals = data["1h"], []
for i in range(1, len(df)):
prev, curr = df.iloc[i-1], df.iloc[i]
# price crosses above EMA20 → buy signal
if prev["close"] < prev["ema20"] and curr["close"] >= curr["ema20"]:
*signals.append(Signal(..., stop_loss=curr["close"]0.98))
return signals
Backtesting Layer: Validating the Strategy
Before risking real money you must validate the strategy against historical data. The core functions of a backtesting engine include:
Bar-by-bar replay: simulated historical prices advance in time order, and the strategy decides at the close of each bar whether to open or close a position
Performance metrics: return, annualised return, volatility, maximum drawdown, Sharpe ratio, win rate, risk/reward ratio and more
Cost simulation: fees (usually 0.1% per side), slippage and the effect of leverage
config = SimulateConfig(
initial_balance=10000,
commission=0.001, # 0.1% commission
risk_per_trade=1.0, # 1% risk per trade
tp_rr=2.0, # 2:1 risk/reward ratio
)
report = Simulate(config).run(strategy_result)
Execution Layer: Connecting to Live Trading
The execution layer turns strategy signals into real orders. Through an exchange API or the CCXT unified interface:
import ccxt
exchange = ccxt.binance({
'apiKey': API_KEY,
'secret': SECRET_KEY,
'options': {'defaultType': 'future'} # futures trading
})
# placing an order
order = exchange.create_order('BTC/USDT', 'limit', 'buy', 0.01, 60000)
Security reminder: an API key created for a trading program must have withdrawals disabled and an IP whitelist attached. This is the most basic account security measure.
Development Workflow: From Zero to Live Trading
Step 1: Set Up the Environment
Start from an open-source framework instead of building everything from scratch. A mature framework offers a complete pipeline for data fetching, backtesting, performance analysis and live trading:
pip install ccxt pandas numpy backtesting
Step 2: Prepare the Data
Pull historical candles from Binance and other exchanges, clean them, and store them in a local database:
# fetching daily candles (SiriFi framework)
fetcher = Sirifi_C_DataStreamer(api_key=API_KEY, api_secret=SECRET)
results = fetcher.fetch(
base_assets=['BTC', 'ETH'],
quote_asset='USDT',
interval='1d',
source='binance'
)
Step 3: Develop the Strategy
Write strategy logic inside the backtesting framework. Start with simple indicator strategies such as MACD golden and death crosses or RSI overbought and oversold levels. Beginners should not start with complex machine learning models.
Step 4: Validate with Backtesting
Backtest the strategy on historical data and focus on maximum drawdown and the Sharpe ratio rather than total return alone. A strategy with high returns but a huge drawdown is very hard to keep executing in live trading.
Step 5: Validate on a Paper Account
Connect the strategy to an exchange testnet (sandbox) and run it with simulated funds for one to three months. This is the key stage for finding code bugs and slippage problems.
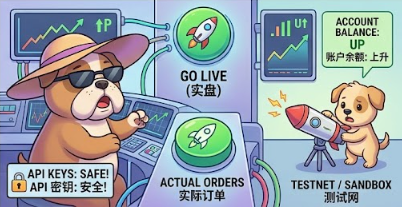
Step 6: Go Live with Small Size
Start live trading with a small amount (no more than 5% of total capital) and only scale up after it proves itself step by step.
Common Open-Source Frameworks
These frameworks are reasonable starting points:
Open Source in-house framework: built on CCXT and the Binance API, covering the whole pipeline of data preparation, backtesting, live trading and database storage; good for learning quantitative engineering architecture
AlgoTradeKit: a lightweight Python backtesting library that supports strategy visualisation and risk/reward based take-profit and stop-loss; good for fast prototyping
StackSats: focused on researching and backtesting Bitcoin dollar-cost averaging strategies
FAQ
Q1: Can I learn algorithmic trading without a programming background?
Yes, but there is a barrier. You need Python basics first (variables, loops, functions and basic pandas operations). Tsinghua University Press publishes an introductory book on blockchain quantitative trading programming that covers everything from exchange API setup to concrete strategy implementation.
Q2: Does algorithmic trading require machine learning?
No. The vast majority of profitable strategies are rule-based strategies built on traditional technical indicators such as moving averages, RSI and Bollinger Bands. Machine learning (LSTM forecasting, for example) is an advanced direction to explore once you have some experience.
Q3: What infrastructure does live trading require?
At minimum: a cloud server (so the program runs around the clock), exchange API keys (with restricted permissions), and a stable network connection. After deployment, configure logging and error alerts so program faults are caught in time.
Related tutorials:
Recommended reading:
Lectura recomendada
Ver más